终极目标:掌握和使用node
本博客目的:记录node学习的进度和心得
内容:Nodejs中的路由模块封装、封装仿照express的路由。
路由模块封装(模块化的方式封装)
上一个blog,我们把get和post操作都写到了服务器代码中,显得很大很臃肿,应该进行封装。
所以我们创建模块,把所有的路由操作封装在这个文件里面:
model.js,即把路由以属性的方式封装到app对象,最后导出这个app对象:
1
2
3
4
5
6
7
8
9
10
11
12
13
14
15
16
17
18
19
20
21
22
23
24
25
26
27
28
29
30
31
32
33
34
35
36
37
38
39
40
41
42
43
44
45
46
47
48
49
50
51
52
53
54
55
56
57
58
59
| var ejs=require('ejs');
var fs=require('fs');
var app={
login:function(req,res){
console.log('login');
ejs.renderFile('views/form.ejs',{},function(err,data){
res.end(data);
})
},
dologin:function(req,res){
var postStr='';
req.on('data',function(chunk){
postStr+=chunk;
})
req.on('end',function(err,chunk) {
console.log(postStr);
fs.appendFile('login.txt', postStr + '\n', function (err) {
if (err) {
console.log(err);
return;
}
console.log('写入数据成功');
})
res.end("<script>alert('登录成功');history.back();</script>")
})
},
register:function(req,res){
console.log('register');
res.end('register');
},
home:function(req,res){
console.log('home');
res.end('home');
}
}
module.exports=app;
|
服务器代码就使用这个路由文件model.js,根据获取的URL的pathname确定使用那个路由,从而执行特点的方法。
这样代码大大简化了:
1
2
3
4
5
6
7
8
9
10
11
12
13
14
15
16
17
18
19
20
21
22
23
24
25
26
27
28
29
30
31
| var http=require('http');
var url=require('url');
var model=require('./model/model.js');
http.createServer(function(req,res){
res.writeHead(200,{"Content-Type":"text/html;charset='utf-8'"});
var pathname=url.parse(req.url).pathname.replace('/','');
if(pathname!='favicon.ico') {
try {
model[pathname](req, res);
} catch (err) {
model['home'](req, res);
}
}
}).listen(8001);
|
这样我们实现了路由模块的封装,如果在model.js一些路由的方法比较复杂,其实还能进一步封装。此外,我们还能以别的方式进行封装。
封装仿照express框架封装的路由
Express 是一个简洁而灵活的 node.js Web应用框架, 提供了一系列强大特性帮助你创建各种 Web 应用,和丰富的 HTTP 工具。
使用 Express 可以快速地搭建一个完整功能的网站。
Express 框架核心特性:
可以设置中间件来响应 HTTP 请求。
定义了路由表用于执行不同的 HTTP 请求动作。
可以通过向模板传递参数来动态渲染 HTML 页面。
(后续我们会接着学)
现在,我们想封装一个这样的路由:直接能够暴露一个接口,然后能够面向这个接口,根据请求方法进行路由匹配及相关处理:
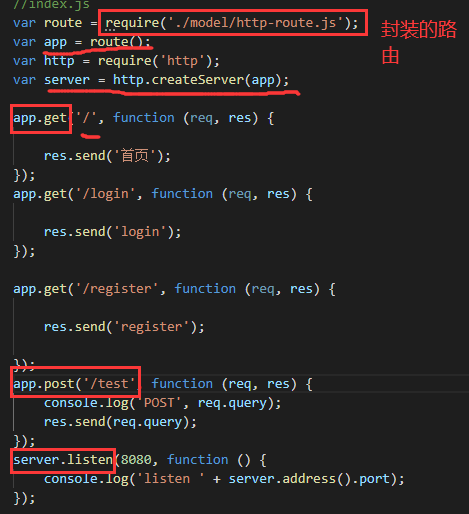
(这样封装使用的形式更简洁)
测试结果:

现在,我们先介绍一下一些基本JS知识:
知识1:对象属性和方法的定义:
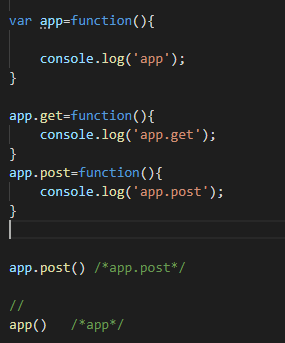
知识2:注册方法与使用方法:
1
2
3
4
5
6
7
8
9
10
11
12
13
14
15
16
17
18
19
20
21
22
23
24
25
26
27
28
| var G={};
var app=function(req,res){
if(G['login']){
G['login'](req,res);
}
}
app.get=function(string,callback){
G[string]=callback;
}
app.get('login',function(req,res){
console.log('login'+req);
})
setTimeout(function(){
app('req','res');
},1000);
|
运行结果:
流程理解:首先,定义了一个G对象和带两个参数的app方法;之后定义了一个app的get方法(也是带两个参数)。当执行app.get时,相当于传入了两个参数(‘login’和具体的callback),此时相当于注册了G[login]的一个方法(为具体的callback)。当最后定时1s异步执行app方法时,传参(’req’,’res’),进入app代码,判断是否存在G[‘login’],如果存在则执行注册的方法 G[‘login’] (req,res),最后输出结果。
现在,我们回归到http服务器中。
最早,我们创建一个http服务器时:
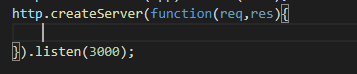
里面的方法定义,其实就是可以看做之前我们定义的app,所以又可以写成:

相当于,一直监听这个app,只有有请求就会出发app这个方法。
完整代码:
1
2
3
4
5
6
7
8
9
10
11
12
13
14
15
16
17
18
19
20
21
22
23
24
25
26
27
28
29
30
31
32
33
34
35
36
37
38
39
40
41
42
43
44
45
46
47
48
49
50
51
52
53
54
55
56
57
58
59
60
61
62
63
64
65
66
67
| var http=require('http');
var url=require('url');
var G={};
var app=function(req,res){
var pathname=url.parse(req.url).pathname;
if(!pathname.endsWith('/')){
pathname=pathname+'/';
}
if(G[pathname]){
G[pathname](req,res);
}else{
res.end('no router');
}
}
app.get=function(string,callback){
if(!string.endsWith('/')){
string=string+'/';
}
if(!string.startsWith('/')){
string='/'+string;
}
G[string]=callback;
}
http.createServer(app).listen(3000);
app.get('login',function(req,res){
console.log('login');
res.end('login');
})
app.get('register',function(req,res){
console.log('register');
res.end('register');
})
|
类似之前的原理。注册路由方法,监听app,只要有请求,就会触发这个请求对应的app这个方法。
现在我们更全面(例如除了get方法,还有post方法)地把这些路由方法封装成一个文件,只暴露接口给HTTP服务器使用。
封装路由文件(类似express框架的风格):
1
2
3
4
5
6
7
8
9
10
11
12
13
14
15
16
17
18
19
20
21
22
23
24
25
26
27
28
29
30
31
32
33
34
35
36
37
38
39
40
41
42
43
44
45
46
47
48
49
50
51
52
53
54
55
56
57
58
59
60
61
62
63
64
65
66
67
68
69
70
71
72
73
74
75
76
77
78
79
80
81
82
83
84
85
86
87
88
89
90
91
92
93
94
95
96
97
98
99
100
101
102
103
104
105
106
107
108
109
110
| var url=require('url');
function changeRes(res){
res.send=function(data){
res.writeHead(200,{"Content-Type":"text/html;charset='utf-8'"});
res.end(data);
}
}
var Server=function(){
var G=this;
this._get={};
this._post={};
var app=function(req,res){
changeRes(res);
var pathname=url.parse(req.url).pathname;
if(!pathname.endsWith('/')){
pathname=pathname+'/';
}
var method=req.method.toLowerCase();
if(G['_'+method][pathname]){
if(method=='post'){
var postStr='';
req.on('data',function(chunk){
postStr+=chunk;
})
req.on('end',function(err,chunk) {
req.body=postStr;
G['_'+method][pathname](req,res);
})
}else{
G['_'+method][pathname](req,res);
}
}else{
res.end('no router');
}
}
app.get=function(string,callback){
if(!string.endsWith('/')){
string=string+'/';
}
if(!string.startsWith('/')){
string='/'+string;
}
G._get[string]=callback;
}
app.post=function(string,callback){
if(!string.endsWith('/')){
string=string+'/';
}
if(!string.startsWith('/')){
string='/'+string;
}
G._post[string]=callback;
}
return app;
}
module.exports=Server();
|
服务器代码(使用EJS模板渲染):
1
2
3
4
5
6
7
8
9
10
11
12
13
14
15
16
17
18
19
20
21
22
23
24
25
26
27
28
29
30
31
32
33
34
35
36
37
38
39
40
41
42
43
44
45
46
47
48
49
50
51
52
53
54
55
| var http=require('http');
var ejs=require('ejs');
var app=require('./model/express-route.js');
console.log(app);
http.createServer(app).listen(3000);
app.get('/',function(req,res){
var msg='这是数据库的数据'
ejs.renderFile('views/index.ejs',{msg:msg},function(err,data){
res.send(data);
})
})
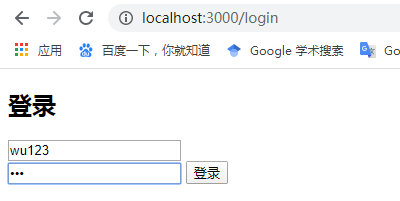
app.get('/login',function(req,res){
console.log('login');
ejs.renderFile('views/form.ejs',{},function(err,data){
res.send(data);
})
})
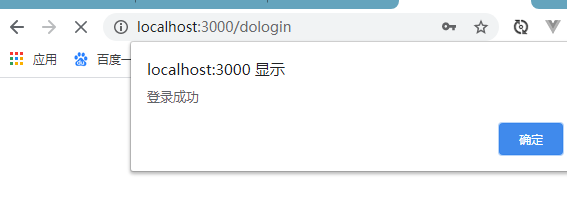
app.post('/dologin',function(req,res){
console.log(req.body);
res.send("<script>alert('登录成功');history.back();</script>")
})
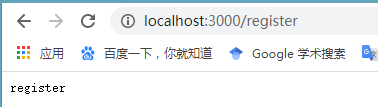
app.get('/register',function(req,res){
console.log('register');
res.send('register');
})
app.get('/news',function(req,res){
console.log('register');
res.send('新闻数据');
})
|
执行结果:
login:

news:

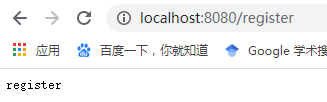
register:
小结:这样就实现了express框架封装的路由,逻辑清晰,使用起来很方便。